How to Screen Record on Mac
Record your Mac screen in seven steps with the built-in Screenshot toolbar — no extra app needed. Read one step at a time and finish each before the next. Start with the 30-second preflight. Video has no audio? See no audio. Recording plays back black? Try screen permission. Can't find the file? Use find the file.
Tips for reading this guide
- One step at a time. Read the green caption, the Why line, then the bullets.
- Move on when the green done line is true — then go to the next step.
- Cmd is the key next to the space bar with the ⌘ symbol.
- On a phone? Tap Jump to section at the top.
- No sound or black video? Jump to the matching branch below.
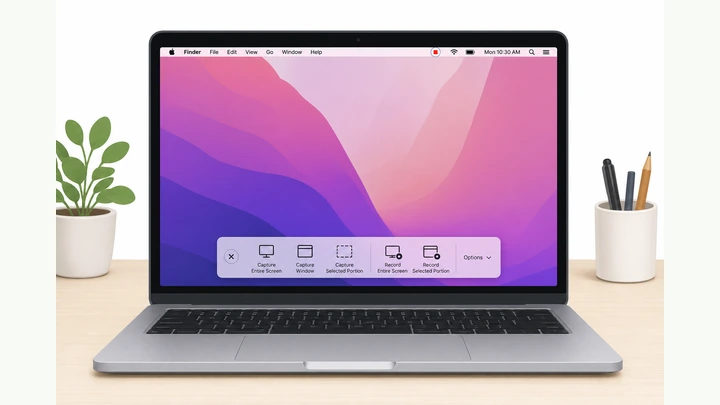
Things You'll Need
- Mac running macOS Mojave (10.14) or later — check Apple menu → About This Mac
- Built-in or Apple keyboard with Cmd (⌘), Shift, and number keys
- At least 500 MB free disk space for a short recording
- Optional: external microphone if you want clearer voice (built-in mic works too)
Start hereBuilt-in screen recording — Cmd+Shift+5
30-second preflight — all four checks must be YES.
macOS 10.14+ · 500 MB free · know Cmd+Shift+5 · close private windows.
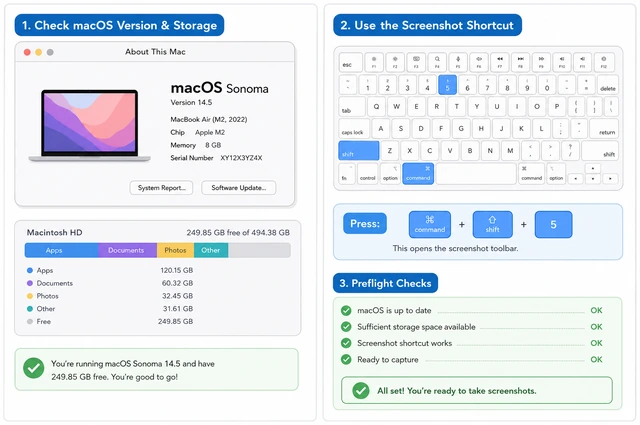
Screen recording needs a recent macOS version, disk space for the .mov file, and the correct keyboard shortcut — checking first avoids a failed recording.
- macOS 10.14 or later? Apple menu → About This Mac — version must be Mojave or newer.
- 500 MB free? Apple menu → System Settings → General → Storage.
- Know the shortcut? Cmd+Shift+5 opens the recording toolbar (not Cmd+Shift+3, which takes a still screenshot).
- Private stuff hidden? Close banking tabs and messages you don't want in the recording.
macOS version is 10.14+, at least 500 MB free, and you know Cmd+Shift+5 opens the recording toolbar.
All YES? Continue to Step 1.
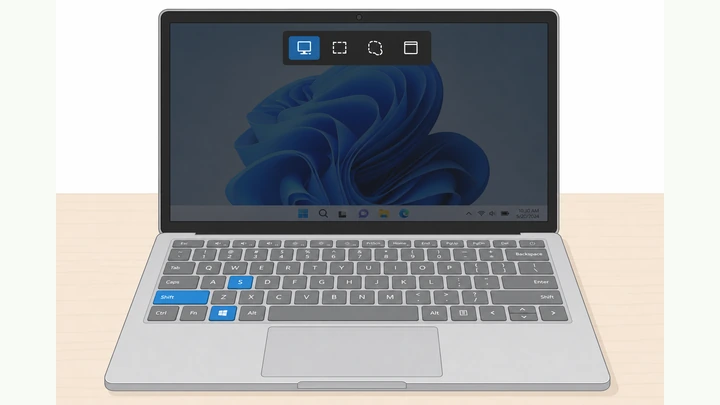
Press Cmd+Shift+5 to open the Screenshot toolbar.
Hold Cmd+Shift, tap 5 — toolbar appears at the bottom.
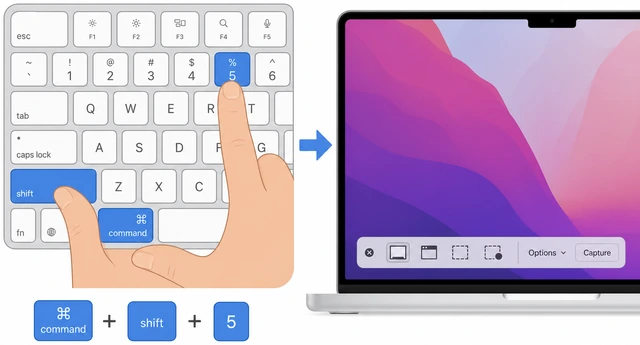
Apple put screen recording in the same Screenshot toolbar as still captures — one shortcut opens every capture tool.
- Click the desktop or any app so your Mac is awake.
- Hold Cmd (⌘) and Shift, then press 5.
- A floating bar appears at the bottom with capture and record icons.
The Screenshot toolbar is visible at the bottom of your screen with record icons on the right side.
Nothing appears? Make sure no other app is blocking shortcuts — quit games in fullscreen first.
Choose Record Entire Screen or Record Selected Portion.
Solid rectangle icon = full screen · dashed rectangle = drag a box.
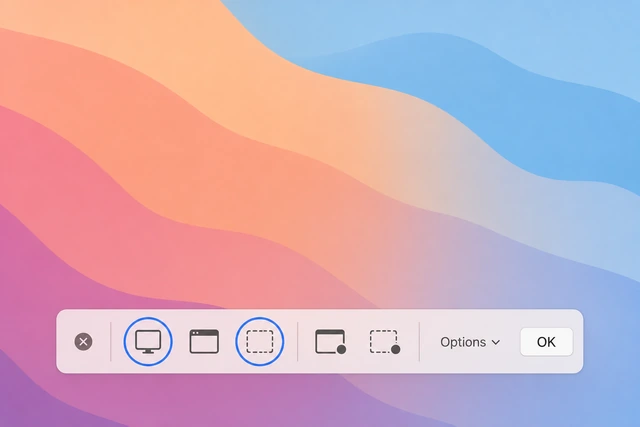
Picking the mode before you hit Record tells macOS how much of the display to include — you can't switch mid-recording without starting over.
- For everything on screen, click Record Entire Screen (solid rectangle with record dot).
- For one window or area, click Record Selected Portion (dashed rectangle).
- Selected portion: drag the corners to frame the area, then continue to Step 4.
The correct record mode is selected — full screen is armed, or a dashed box frames your chosen area.
Want one app only? Use Selected Portion and drag the box around that window.
Click Options and set save location and microphone.
Options → Save to Desktop · Microphone ON if you want voice.
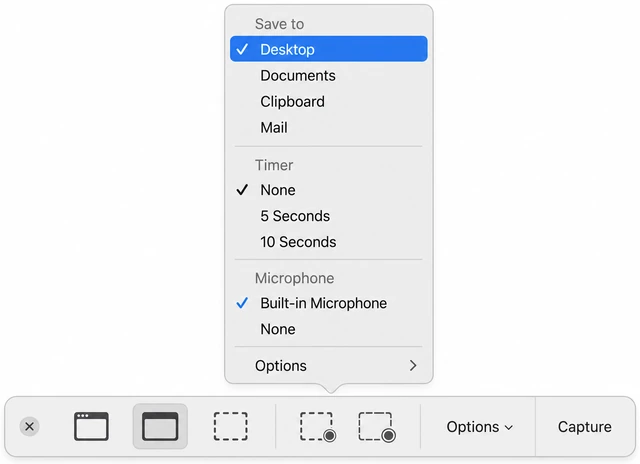
Defaults save to Desktop with no mic — changing Options now means you won't hunt for the file or wonder why the video is silent later.
- Click Options on the toolbar.
- Under Save to, pick Desktop (or another folder you will remember).
- Under Microphone, select Built-in Microphone (or your headset) if you want audio.
- Leave Timer at None unless you need a delay.
Options shows your chosen save folder and microphone setting (on or off — your choice, but you know which).
No audio in the finished video? → No audio branch.
Click Record to start capturing.
Full screen: click Record on toolbar. Portion: click Record inside the dashed box.
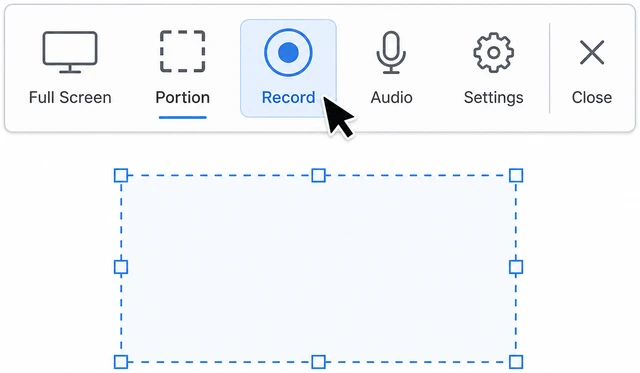
The Record click is what actually starts writing the .mov file — until then, macOS is only showing you the setup overlay.
- Entire screen: click Record on the toolbar, then click the screen if asked which display.
- Selected portion: click Record inside the dashed rectangle.
- A 5-4-3-2-1 countdown may appear in the corner — wait for it to finish.
Recording is running — the menu bar shows a small stop icon (filled circle or square) on the right.
Playback is black? → Screen permission branch before re-recording.
Do what you need to capture on screen.
Use your Mac normally — the stop icon stays in the menu bar.
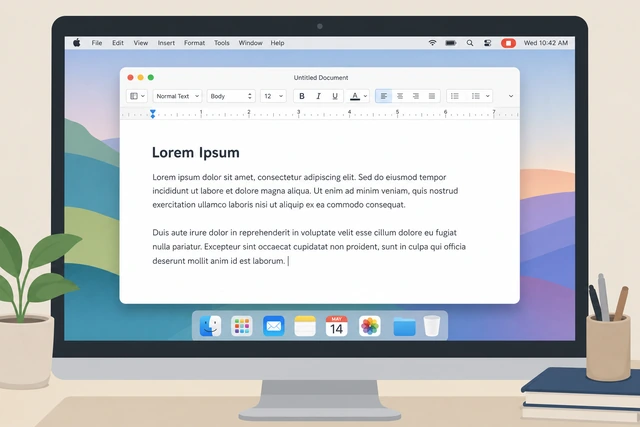
Everything visible in the recorded area (and audio if enabled) is written to the file — plan your clicks and narration before you stop.
- Open apps, click menus, and type as you would normally.
- Speak clearly if microphone is on — face the Mac or stay close to the built-in mic.
- Keep the recording short for your first try — under 2 minutes is enough to test.
You finished the actions you wanted on screen and the stop icon is still visible in the menu bar.
Click the stop icon in the menu bar to end recording.
Click the stop icon — or press Cmd+Control+Esc.
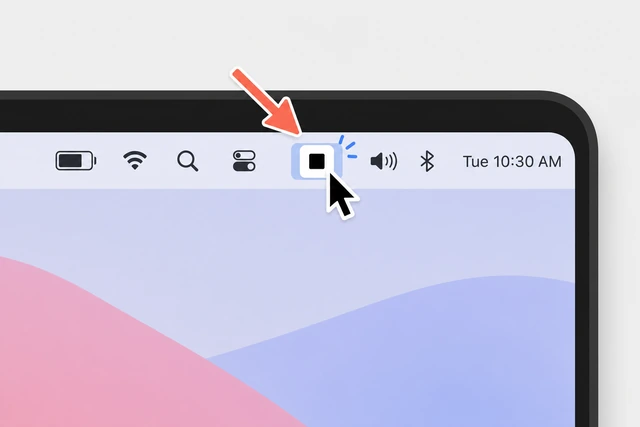
Stopping flushes the video file to disk — if you force-quit an app instead, the recording may corrupt or stay unsaved.
- Move the pointer to the top-right of the screen.
- Click the stop icon in the menu bar.
- Alternative: press Cmd+Control+Esc on the keyboard.
The stop icon disappeared and a small thumbnail of your recording appeared in the bottom-right corner of the screen.
Open the .mov file and confirm it plays.
Click the thumbnail — or open the .mov on Desktop.
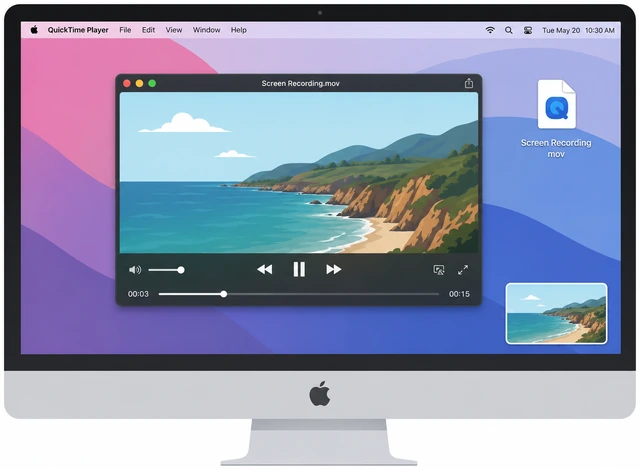
Playing the file right away confirms resolution, audio, and length — easier to re-record now than discover a problem hours later.
- Click the thumbnail in the corner to preview, or double-click the Screen Recording file on Desktop.
- The file opens in QuickTime Player — press the space bar to play.
- Check picture and sound — re-record from Step 1 if something is wrong.
The .mov file plays in QuickTime and shows the screen actions (and audio if you enabled the mic).
No file on Desktop? → Can't find file branch.
If the recording has no audioMicrophone was off or wrong input selected
Use when the video plays fine but you hear no voice or system sound.
Re-open Options and turn Microphone on before recording again.
Cmd+Shift+5 → Options → Microphone → Built-in Microphone.
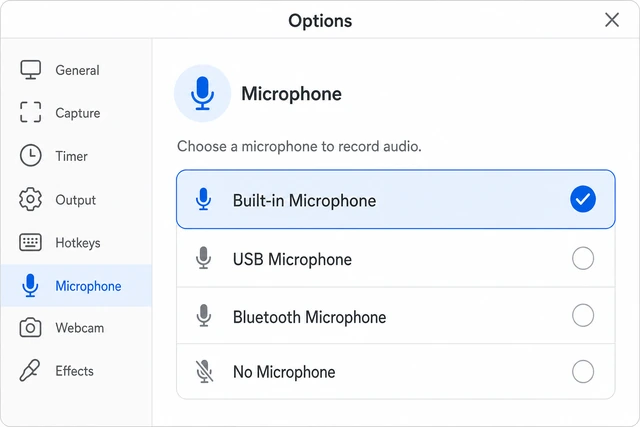
macOS does not record mic audio unless you pick a microphone in Options each time — it is not remembered from still screenshots.
- Press Cmd+Shift+5 again.
- Click Options → under Microphone, choose Built-in Microphone or your USB headset.
- Record a 10-second test clip and play it back.
A new test recording plays your voice clearly in QuickTime.
Built-in screen recording does not capture internal app audio (like Spotify) on most Macs — only microphone input. For app audio you need third-party software.
If the recording plays back blackScreen Recording permission blocked
Use when QuickTime plays a file but the picture is all black while audio may work.
Allow Screen Recording for the app you are capturing.
System Settings → Privacy & Security → Screen Recording → toggle ON.
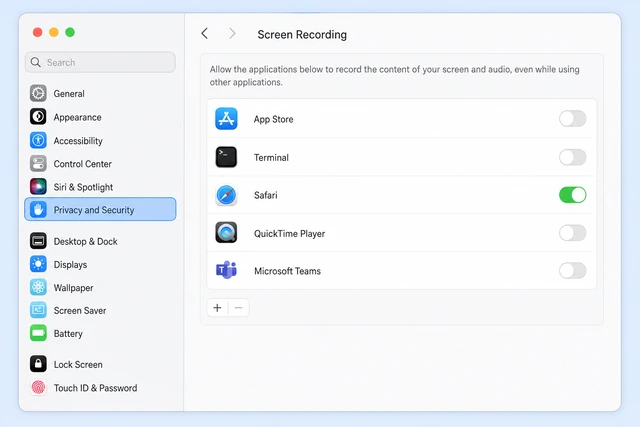
macOS blocks pixel capture until you explicitly allow it — without permission the file saves but shows a black frame.
- Open System Settings → Privacy & Security → Screen Recording.
- Turn ON the switch for the app you are recording (e.g. Safari, Chrome, Zoom).
- Quit and reopen that app, then record again from Step 1.
The new recording shows your actual screen content, not a black frame.
Some streaming apps (Netflix, Disney+) block recording by design — black screen is expected there.
If you can't find the saved fileWrong save folder or thumbnail dismissed
Use after stopping when no file appears on Desktop and the corner thumbnail is gone.
Search for Screen Recording .mov files in Finder.
Finder → search Screen Recording · sort by Date Modified.
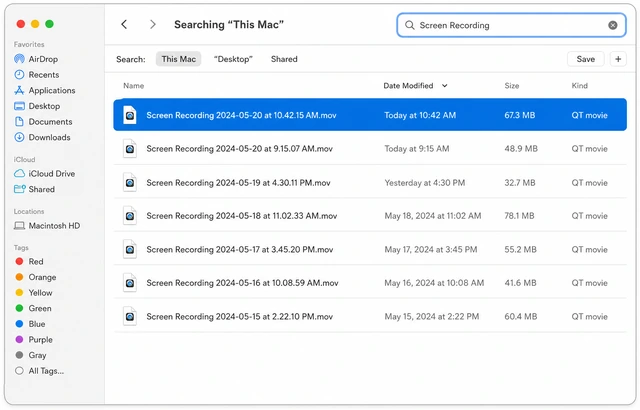
The default name is always Screen Recording with a date — searching beats clicking through every folder if you changed Save to in Options.
- Open Finder and press Cmd+F.
- Search for Screen Recording and set kind to Movie.
- Click Date Modified to sort newest first — double-click the top result.
You found and opened the newest Screen Recording .mov file.
Still missing? Check Options → Save to on the toolbar — you may have picked Documents or another folder.
When This Doesn't Work
- macOS Catalina (10.15) or older on very old Macs — update macOS or use QuickTime Player → File → New Screen Recording instead.
- DRM-protected video (streaming services) records as black by design — not a settings bug.
- Recording a second display only — click the screen thumbnail after Record on multi-monitor setups to pick the correct display.
Warnings
- Don't record passwords, bank logins, or private messages — screen recordings are easy to share by mistake.
- Long recordings eat disk space fast — 1080p video uses about 200 MB per 10 minutes.
- Quitting the Mac without stopping recording first can corrupt the .mov file.
Tips
- Hide desktop clutter before recording: right-click Desktop → Use Stacks, or enable Do Not Disturb so alerts don't pop up.
- Press Cmd+Shift+5 and click Options → Show Mouse Clicks to make taps visible in the video.
- Trim the ends in QuickTime: Edit → Trim, then File → Save.
FAQ
Does Cmd+Shift+5 work on MacBook Air and MacBook Pro?
Yes — any Mac on macOS Mojave (10.14) or later has the same Screenshot toolbar. The shortcut is identical on Apple Silicon and Intel models.
Can I record internal audio (computer sound) without a microphone?
The built-in tool records microphone input only. Capturing app or system audio requires third-party apps or audio loopback tools — not covered in this guide.
What file format does Mac screen recording use?
Screen Recording saves as .mov (H.264 video). You can open it in QuickTime, iMovie, or upload directly to YouTube and most editors.
Comments
Questions, corrections, and what worked for you. Comments are reviewed before they appear.