How to Swim
Read one step at a time — do not skip ahead until the green Move on when line is true. Most adults skip breath rhythm and try to swim with their head up the whole way. This guide walks you through edge → wet face → bubbles → bob → float → kick → pull → glide → breathe → short swim in order. Start with the 30-second preflight. Afraid to put your face in, or hips won't float? Pick a branch below before Step 3.
Tips for reading this guide
- One step at a time. Read the green caption, the Why line, then the bullets.
- Move on when the green done line is true — then go to the next step.
- Stay in the shallow end until Step 12 — you should always stand up if you need to.
- Stuck on breathing? Go back to Step 3 for ten more bubble reps before Step 10.
- On a phone? Tap Jump to section at the top.
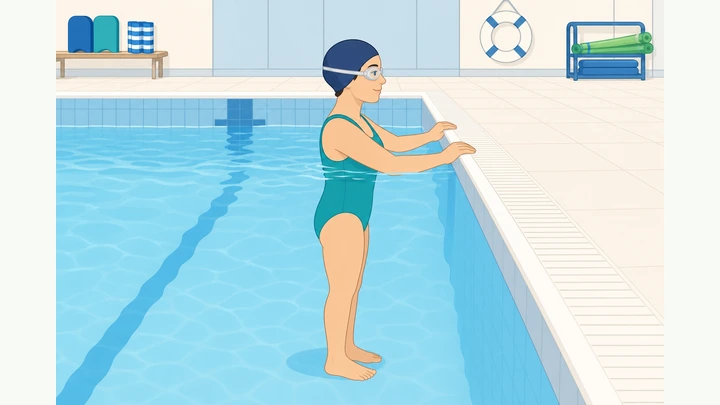
Things You'll Need
- Swimsuit that fits — nothing loose that can snag
- Goggles (optional — cuts eye sting and helps you see underwater)
- Kickboard — most pools lend one at the wall
- Towel and flip-flops for the deck
- Friend or lifeguard nearby for the first session (strongly recommended)
What's blocking you right now?
Most beginners use the twelve-step path. Jump to a branch if your face won't go under or your hips sink every time you try to float.
Start hereTwelve steps from pool comfort to your first shallow-end swim
Four quick checks — shallow end only.
YES to all four — then start Step 1.
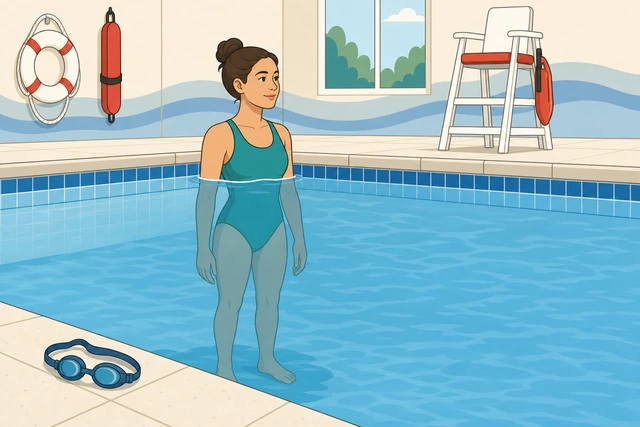
Most beginner panic happens in water over your head before basic breath control — shallow water fixes that.
- Find the shallow end. Look for a depth sign or ask the lifeguard — water should hit your chest, not your chin, when you stand flat.
- Shallow end check: Walk in until water reaches mid-chest; both feet flat on the bottom. If you must tip-toe, move toward the stairs.
- Someone watching? Point to the lifeguard chair or tell a friend on deck: "I'm learning — keep an eye on me."
- Body check: No dizziness, no open cuts, no big meal in the last hour.
- Goggles: Adjust strap so they seal without pinching; if you skip goggles, keep a towel at the wall for wet eyes.
All four checks are YES — you are in chest-deep water, someone can see you, you feel OK, and goggles are on or beside you.
Stand in chest-deep water and hold the pool edge.
Feet flat on the bottom — grip the gutter or lane rope.
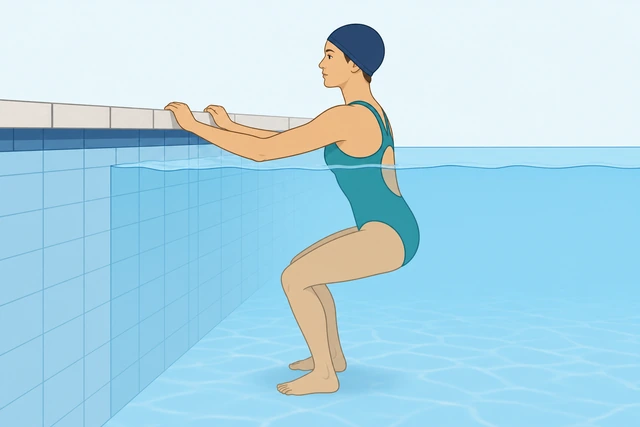
Holding the wall gives your brain a fixed point so your body can relax before your face goes under.
- Walk along the pool wall until water reaches the middle of your chest.
- Face the wall; place both hands on the gutter or lane-rope edge shoulder-width apart.
- Stand with feet flat, knees slightly bent, toes pointing at the wall.
- Relax your shoulders; let the water push up on your chest for a full 30 seconds.
- Take three slow breaths — in through the mouth, out through the mouth — face still above water.
You can hold the edge for 30 seconds without gripping white-knuckle tight, and your breathing stays calm.
Water feels cold? Stay still 30 seconds — your skin adapts fast.
Wet your chin and lips — keep breathing.
Chin touches water — mouth and nose still clear at first.
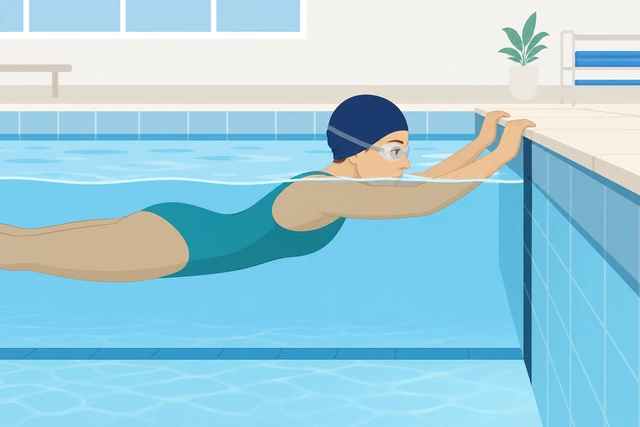
Gradual wetting trains your nervous system — jumping straight to full submerge triggers the gasp reflex.
- Keep both hands on the edge — do not let go yet.
- Take a normal breath with your face above water.
- Slowly bend your knees until your chin and lips touch the water surface.
- Your nose and eyes stay above the water line on this step.
- Lift back up, breathe, and repeat ten dips — count out loud if it helps.
You completed ten chin-dips without freezing your breath or pulling your face away fast.
Still panicking? → face-in-water branch — do not go to Step 3 yet.
Blow bubbles with your mouth and nose underwater.
Exhale a steady stream — never hold your breath under.
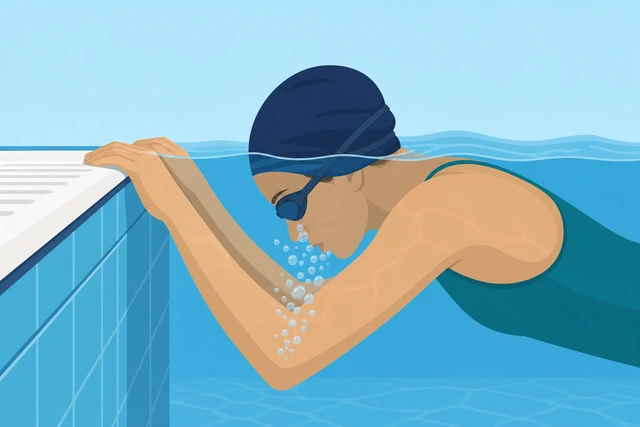
Exhaling underwater stops the gasp reflex — holding your breath is what makes people bolt upright panicking.
- Inhale through your mouth while your face is above water.
- Lower until your eyes, nose, and mouth are all under the surface.
- Blow a steady stream of bubbles from nose and mouth for four to five seconds — feel the air leave.
- Lift your face, inhale once through the mouth, rest two seconds.
- Repeat ten bubbles; rest 30 seconds, then do a second set of ten.
Twenty bubble reps total — you exhaled the whole time underwater and never held your breath until you lifted to inhale.
Bob at the wall — inhale up, exhale down.
Rhythm: up for air, down for bubbles — like a slow jack-in-the-box.
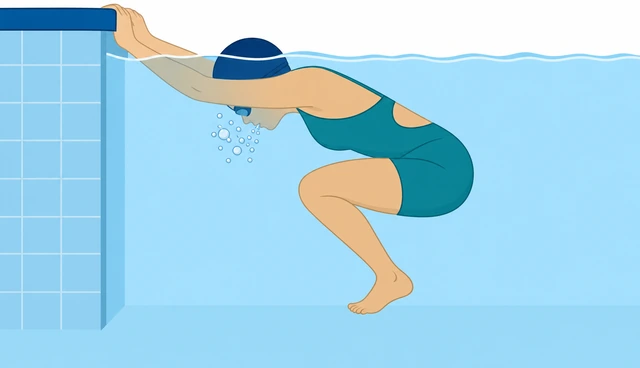
Bobbing links breathing to body motion — the same rhythm you'll use when swimming, but with the wall as backup.
- Hold the edge with both hands, arms straight but not locked.
- Inhale with face above water.
- Bend knees and dip until your face is fully under — start blowing bubbles immediately.
- Straighten legs to bring mouth above water — take one quick inhale only.
- Repeat fifteen bobs in a row without stopping longer than two seconds at the top.
Fifteen continuous bobs — each dip includes bubbles underwater and one clean inhale at the top.
Gasping at the top? Slow the bobs — you only need a sip of air, not a deep lungful.
Practice a back float — one hand stays on the wall.
Ears in the water, hips up, one hand lightly on the tile.
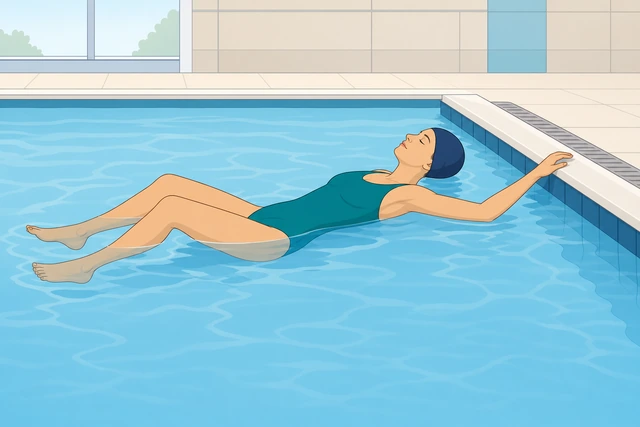
A supported back float proves the water can hold you — that trust cuts fear before you let go of the wall.
- Turn so your back faces the water; keep one hand on the wall edge.
- Let your legs rise — a small knee bend is OK.
- Push your belly button toward the ceiling so hips float up.
- Relax your neck until water touches both ears.
- Hold five seconds, stand up, repeat five times with the same hand on the wall.
Five back floats of five seconds each — hips stay near the surface and you do not bolt upright.
Hips drop every time? → hips-sink branch before Step 6.
Flutter kick with a kickboard — head above water.
Kick from the hips — small splashes, not thunder.
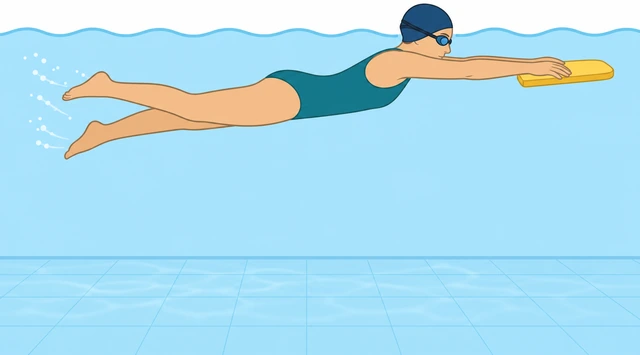
Learning kick with your head up isolates leg motion — you aren't fighting breath and kick at the same time yet.
- Pick up a kickboard from the wall rack (flat foam board about forearm length).
- Hold the far end with both hands, arms straight, board flat on the surface.
- Keep your face above water — breathe normally.
- Kick small quick beats from the hips; toes pointed, knees loose — not bicycle pedaling.
- Kick ten yards along the wall, rest 20 seconds at the wall, repeat three round trips.
Three ten-yard kickboard laps with your head up — legs stay behind you, not bending big at the knee.
Kickboard kick with your face in the water between breaths.
Look straight down at the bottom — blow bubbles the whole way.
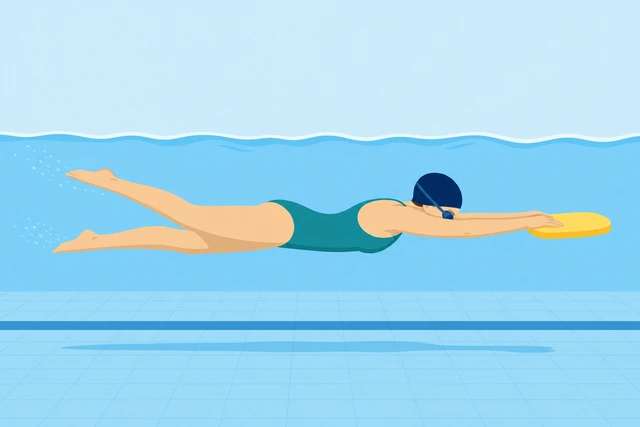
Face-down kicking connects your Step 3 bubbles to forward motion — the pattern you'll use in full freestyle.
- Same kickboard grip — arms extended, board flat.
- Put your face in the water looking straight down at the pool bottom.
- Exhale steadily through nose and mouth the whole time you kick.
- At the wall: lift face, one quick inhale, turn around.
- Kick five yards out and five yards back — that is one lap. Complete three laps.
Three kickboard laps face-down — you exhaled the entire way and only inhaled at the wall.
Water up your nose? Start exhaling through your nose the instant your face enters.
Pull one arm underwater along the wall.
Fingers together — reach forward, pull to your hip.
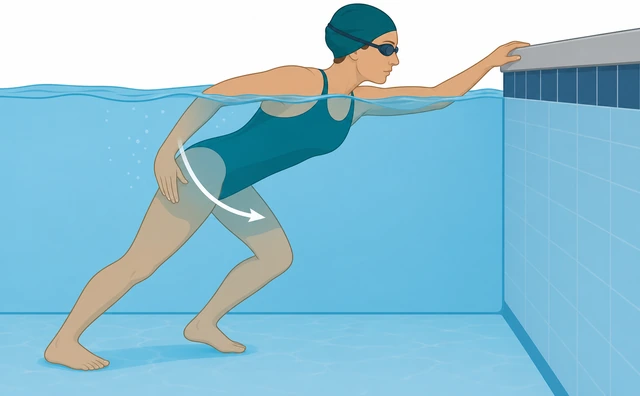
A full underwater pull moves you farther than splashing on top — this is the power phase of freestyle.
- Stand chest-deep facing the wall; left hand (or non-dominant) stays on the edge.
- Extend your free arm forward underwater, fingers together, palm angled slightly down.
- Pull in a smooth arc along your side until your hand reaches your hip pocket.
- Lift elbow, recover arm above water forward, and repeat.
- Do five full pulls with the right arm, then five with the left.
Ten single-arm pulls total — each pull starts at full extension and finishes at your hip with fingers together.
Push off the wall in a streamline glide.
Arms locked beside your ears — glide before you kick.
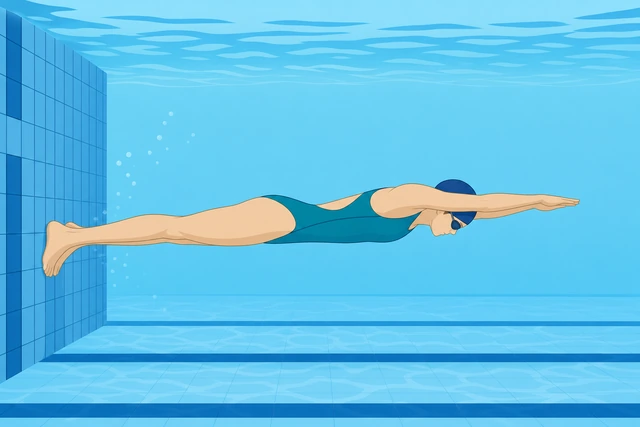
A streamline glide lets momentum do the work so your first strokes start from speed, not a dead stop.
- Stand at the wall in chest-deep water, both feet on the tile.
- Crouch until shoulders are near the surface.
- Stack hands, lock arms straight beside your ears — streamline position.
- Push off on the surface (not underwater yet if that scares you) and glide two to three seconds.
- Stand when you slow; repeat eight push-offs until glide feels smooth.
Eight push-offs where you glide at least two seconds before kicking or standing — arms stay locked overhead.
Chin up kills the glide — look at the bottom, not the far wall.
Turn your head to the side to breathe.
Roll from the hip — one ear stays in the water.
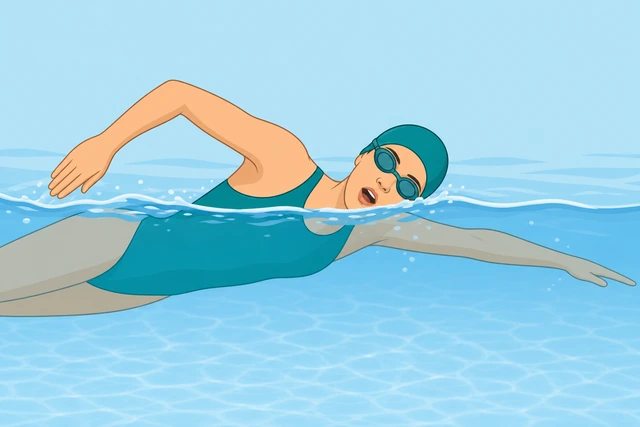
Side breathing keeps your body horizontal — lifting your whole head drops your legs and kills forward motion.
- Push off in streamline; start freestyle arms and kick together along the wall.
- Take two arm strokes with face down, exhaling underwater.
- On the third stroke, roll head to the right — one ear stays in the water.
- Inhale once through the mouth; face back down and exhale until the next breath.
- Swim ten yards breathing only to the right; rest, then ten yards breathing only to the left.
Two ten-yard passes — one breathing right, one breathing left — without lifting your whole head forward.
Lifted your whole head? Think "one ear in, one ear out" — roll from the hip, not the neck alone.
Swim five yards along the wall — breathe every three strokes.
Stay one arm's length from the wall — grab it if you need to.
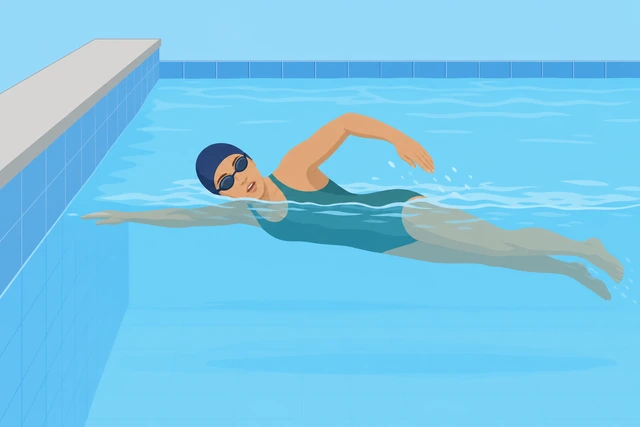
Wall-supported repeats let you reset every five yards — open-water distance comes after this rhythm is automatic.
- Stay one arm's length from the wall so you can grab it anytime.
- Push off in streamline; swim freestyle with kick.
- Breathe to the side every third arm stroke — count: pull, pull, breathe.
- Swim exactly five yards (about four big arm cycles), touch wall with both hands.
- Rest 30 seconds; repeat five times before trying to leave the wall.
Five five-yard repeats with a breath every three strokes — you touched the wall each time without standing mid-swim.
Swim across the shallow end.
Ten yards calm beats twenty yards panicked.
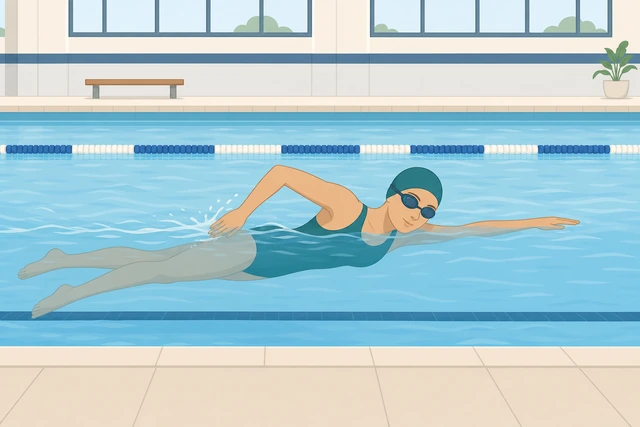
Short calm repeats build muscle memory without the exhaustion that makes beginners thrash and sink.
- Pick a lane line or tile mark about ten yards away — count tiles if unsure (often one foot each).
- Push off, kick steady, breathe every three strokes.
- Swim at a pace where you could say one word if asked — not sprinting.
- Touch the far mark or wall with at least one hand.
- Rest 45 seconds at the wall; complete three calm crossings total.
Three ten-yard crossings without stopping mid-lane to stand — you touched the far end each time.
Need a break mid-swim? tuck knees to chest and stand — shallow water is your safety net.
If your face won't go under yetGradual wet-face drills — stay at the wall
Use when Step 2 or 3 feels impossible — panic, nose burning, or gasping the moment your mouth gets wet.
Splash water on your cheeks with your hand — eyes open.
Cup water with your palm — don't dunk yet.
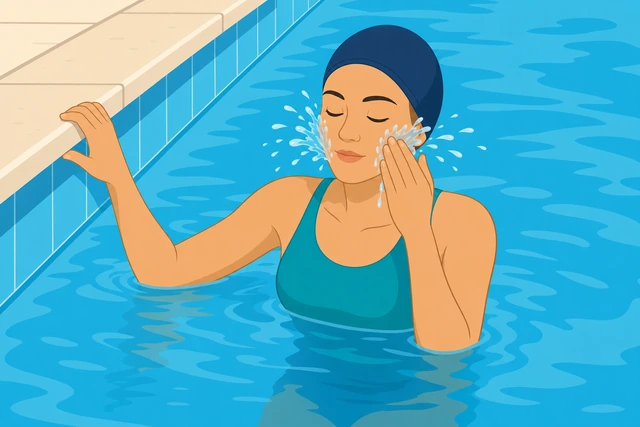
Splashing desensitizes your face without the trapped feeling of a full dunk — smaller steps stick for anxious beginners.
- Hold the edge with one hand; stand chest-deep.
- Cup the other hand, scoop water from the surface.
- Splash both cheeks gently — eyes can blink, keep breathing through your mouth.
- Do not dunk your face yet.
- Repeat ten splashes; rest 20 seconds; repeat ten more.
Twenty cheek splashes with steady breathing — no gasping or turning away.
Hold your breath for two seconds with lips in the water only.
Nose stays dry — only lips touch the surface.
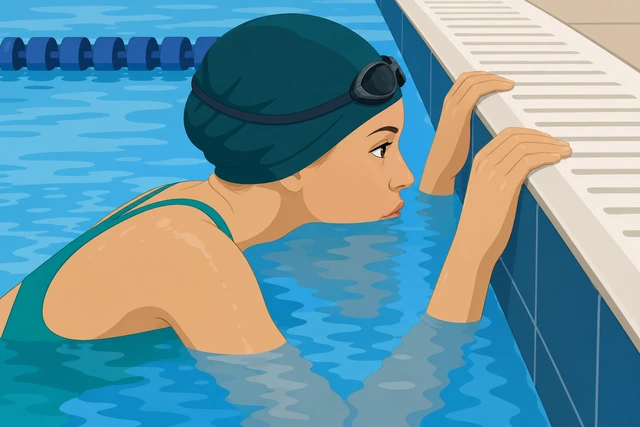
Keeping the nose dry removes the main trigger for beginners — chlorine sting and the can't-breathe feeling.
- Both hands on the edge.
- Inhale above water through your mouth.
- Lower until only your lips touch the water — nose and eyes stay dry.
- Hold two seconds, lift, exhale, repeat eight times.
- Next session add one second until you reach five seconds comfortably.
Eight lip-only holds of two seconds — nose never got wet and you did not hold your breath while submerged.
Return to main Step 3 — five bubble reps only.
Five good bubbles today beats fifty panicked ones.
Ending on success rewires fear faster than pushing through panic — small wins compound over two or three pool visits.
- Return to main Step 3 instructions.
- Do only three bubble reps today — quality over quantity.
- Stop while it still feels OK; do not push through panic.
- Next pool visit add two reps until you reach ten easy reps.
- When ten bubble reps feel calm, rejoin the main path at Step 4.
At least three calm bubble reps in one session — you chose to stop before panic, not after.
If your hips sink every timeFix float position before kickboard work
Use when Step 5 back float fails — legs drop, you bolt upright, or you feel like you're sinking.
Mushroom float — hug knees to chest at the wall.
Forehead on the surface, knees pulled in — feet may touch the bottom.
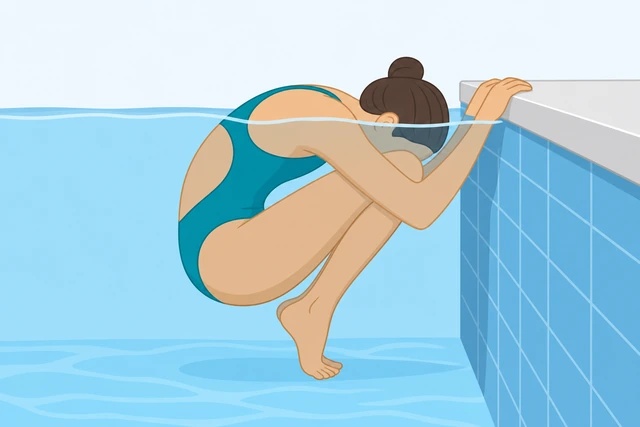
A tucked body floats easily because your lungs stay near the surface — this proves buoyancy before you try a long horizontal float.
- Hold the edge with both hands in chest-deep water.
- Pull both knees toward your chest until your back rounds like a ball.
- Let your forehead rest on the water surface.
- Exhale slowly through your nose for the whole hold.
- Hold five seconds, stand, repeat five times.
Five mushroom floats of five seconds — forehead stayed on the surface and you felt hips rise.
Dead-man float face down — hands on the bottom.
Light finger touch on the floor — lift your hips toward the surface.
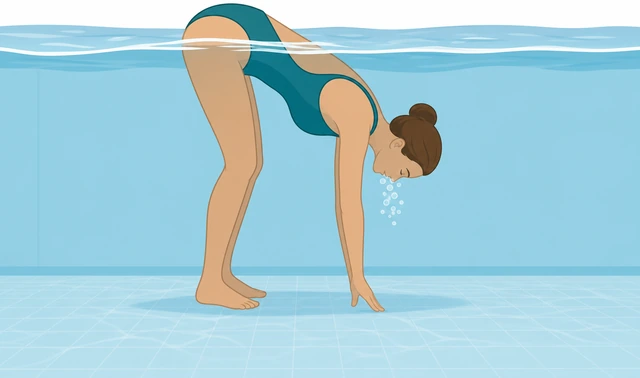
Fingertip support lets you feel hips rising without fear of sinking — the same hip-up position you need for back float.
- Stand chest-deep; bend forward at the waist.
- Place just your fingertips on the pool bottom — light touch, no pushing.
- Let hips rise toward the surface while you exhale bubbles.
- Hold three seconds, stand up straight, repeat eight times.
- Keep water at chest level — do not walk deeper.
Eight fingertip floats where hips clearly rose toward the surface before you stood.
Retry main Step 5 back float — one hand on wall.
Belly button to the sky — press the small of your back toward the surface.
The mushroom and dead-man drills teach the hip-up feeling — back float is the same posture, just horizontal and longer.
- Return to main Step 5 back float.
- One hand on wall, belly button pushed toward the sky.
- Exhale gently — a full chest of air helps hips stay up.
- Hold five seconds; stand; repeat until you get three good holds in a row.
- When three holds pass, continue main path at Step 6.
Three back floats of five seconds in a row with hips near the surface — then rejoin Step 6.
Warnings
- Never swim alone in a pool without a lifeguard or a buddy on deck.
- Do not practice in water deeper than your chest until Steps 1–11 feel easy.
- Stop if you feel dizzy, chest pain, or can't catch your breath after resting 60 seconds.
- No diving in the shallow end — feet-first entry only.
Tips
- Morning sessions are quieter — less wake from other swimmers makes balance easier.
- Nose clips can help for the first bubble session if pool water stings — take them off by Step 7.
FAQ
How long until I can swim laps?
Most adults need four to six practice sessions for a calm 25-yard freestyle. This guide gets you across the shallow end — lap swimming comes after Step 11 rhythm feels automatic.
Do I need formal lessons?
This guide covers the basics, but one hour with a certified instructor can fix kick and breathing faster than weeks of solo trial. Worth it if Step 10 still feels impossible after three pool visits.
Comments
Questions, corrections, and what worked for you. Comments are reviewed before they appear.